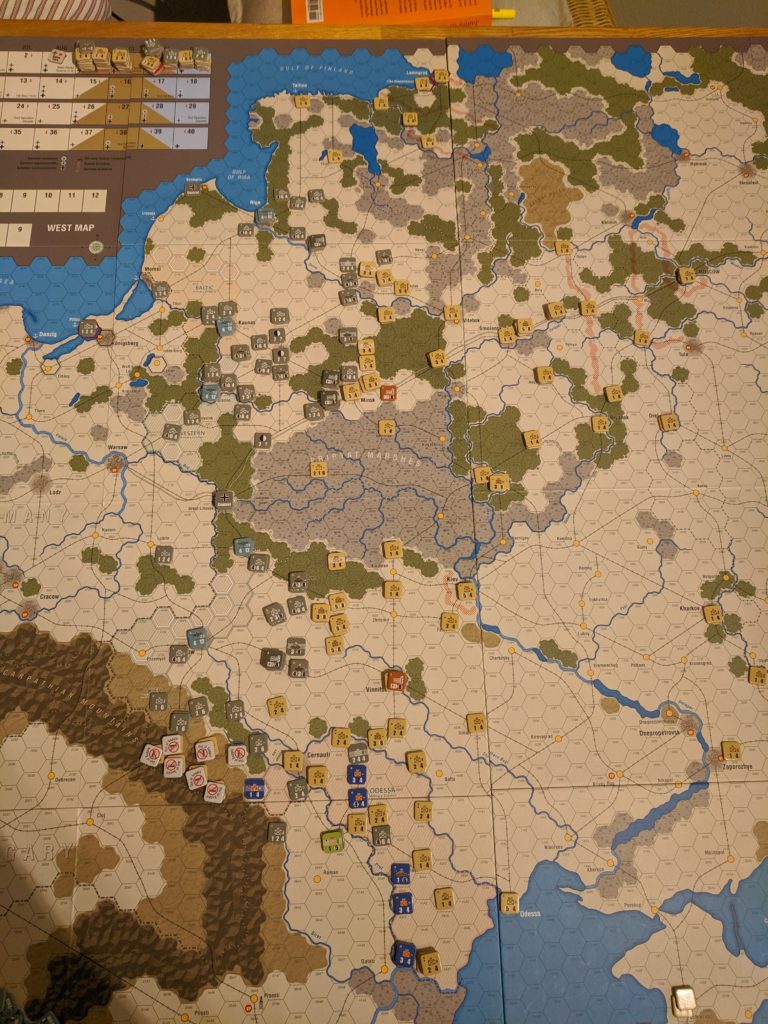
The end of the campaign was already in sight after the last two turns. There was little to no progress in either AG. There are some harsh penalties for Axis units fighting in Snow and away from cities (they are treated as OOS and use a worse CRT). Although a few attacks were made at 3:1 odds, die rolls resulted often in NE — no effect results.
Soviet counter-attacks were successful in the center and even succeeded in encircling some Armies. Stavka HQ plus its reserve was able to break through in the center:
End of Barbarossa.
In the end, I counted 20VP for the Axis, way short of the 30VPs required for a victory (and just a paltry 6VP made from the starting positions).
I’ll gather my thoughts on the system in another post but here are the observations of this game:
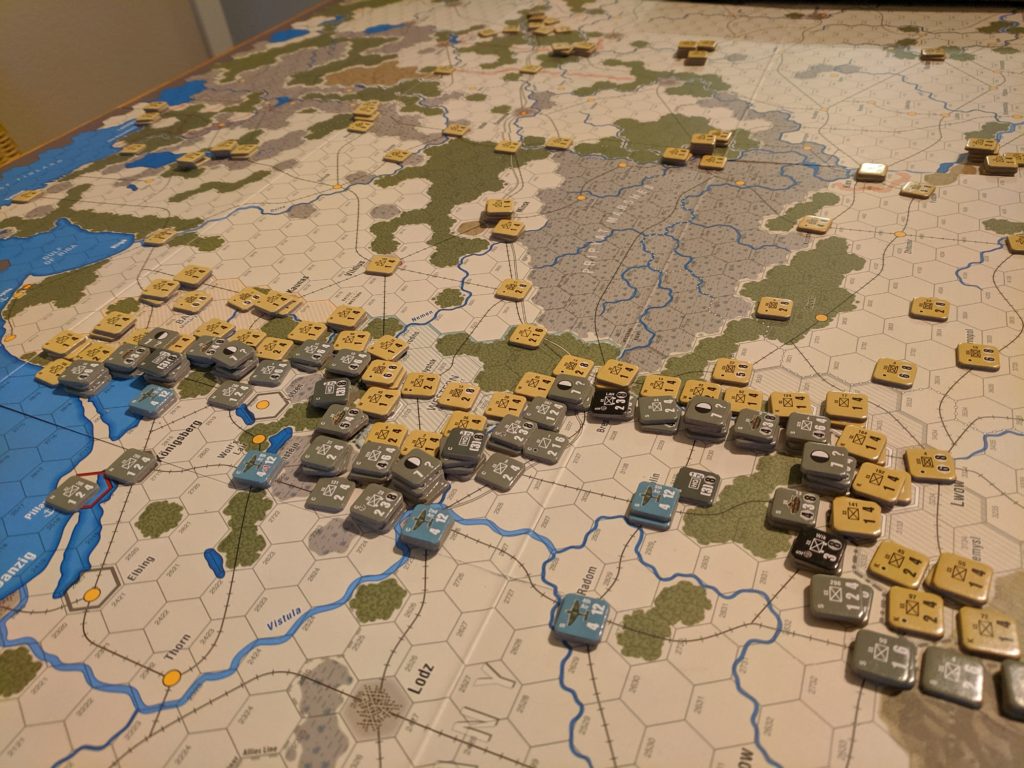
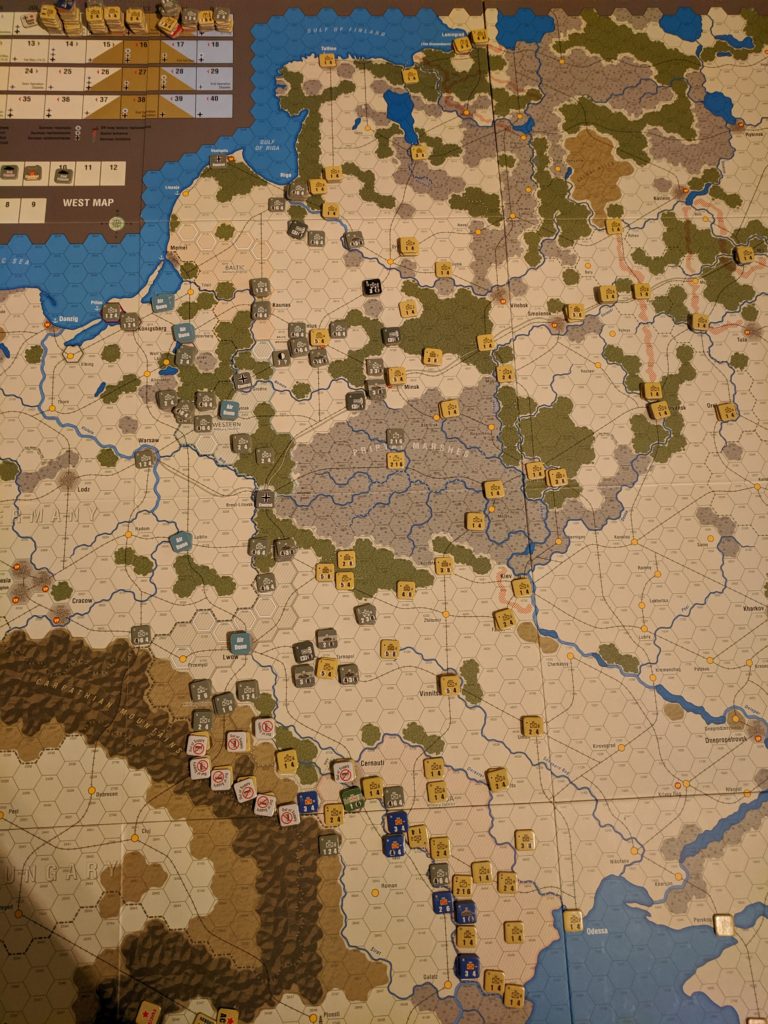
AG North was making steady progress and was the closest to the historical result as they advanced continuously. AG Center started well but ran into problems with terrain. There are lots of woods on the way and the armored units of 2nd and 3rd Pz Army might have been better used further in the south. Two big encirclements were initially achieved early but lucky chit draws allowed the Soviets to withdraw most of their troops without issue. This was the most force-on-force push-and-shove theater. I’m not sure how to do better next time though — the area of operations feels cramped on all sides.
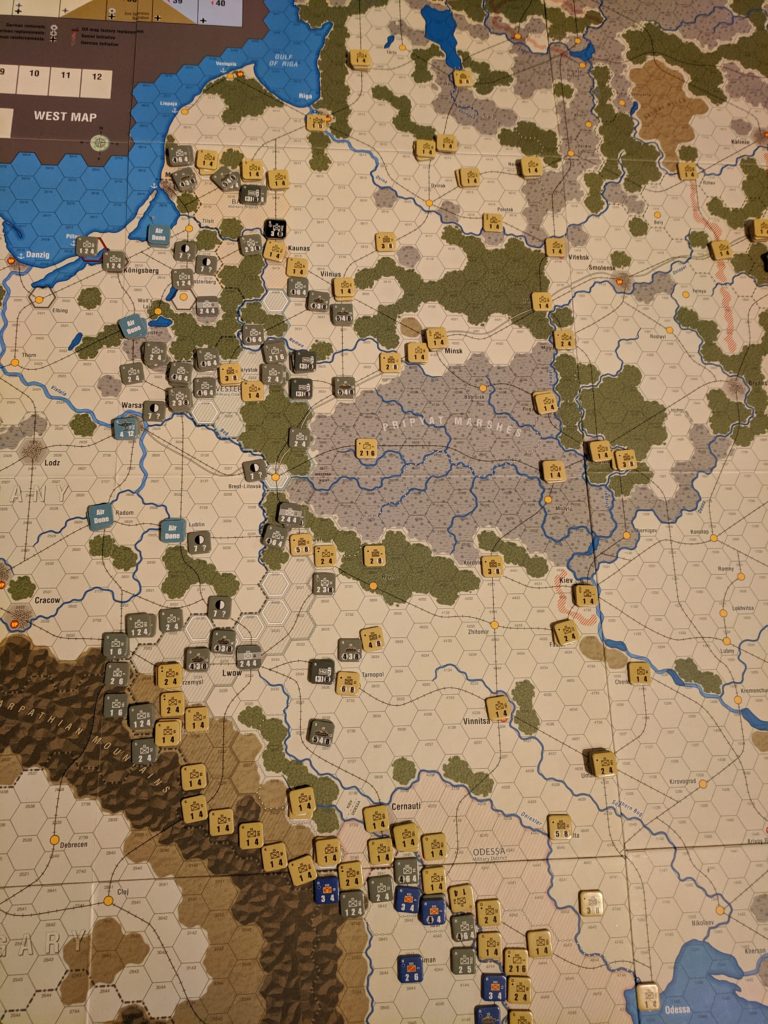
Stavka HQ was able to breach the Axis line in later Winter in the center. Similarly, the Pripyat Marshes were No-Go zones for the Axis which resulted in two Soviet cavalry raids on the supply depots and lines.
The South saw the wholesale destruction of almost all Axis allied forces. Missing the Odessa-front special activation rule completely resulted in zero progress towards Odessa (the Romanian units are maybe 2 hexes from their starting line). I’m also still not sure whether the Soviet units in the Carpathian mountains should last that look. While they’re OOS, they’re not isolated which means they don’t get removed from play.
What becomes apparent at this point in time is that the game is (already) over for the Axis. The Soviets get a minimum of 25 strength points to rebuild this turn as no industrial center was captured yet. This means that every turn five 5-2 Soviet armies are built in addition to the normal reinforcements. The Axis, on the other hand, get little to no reinforcements or replacement points.
I’ll play a couple more turns but the writing is already on the wall for the Axis side.
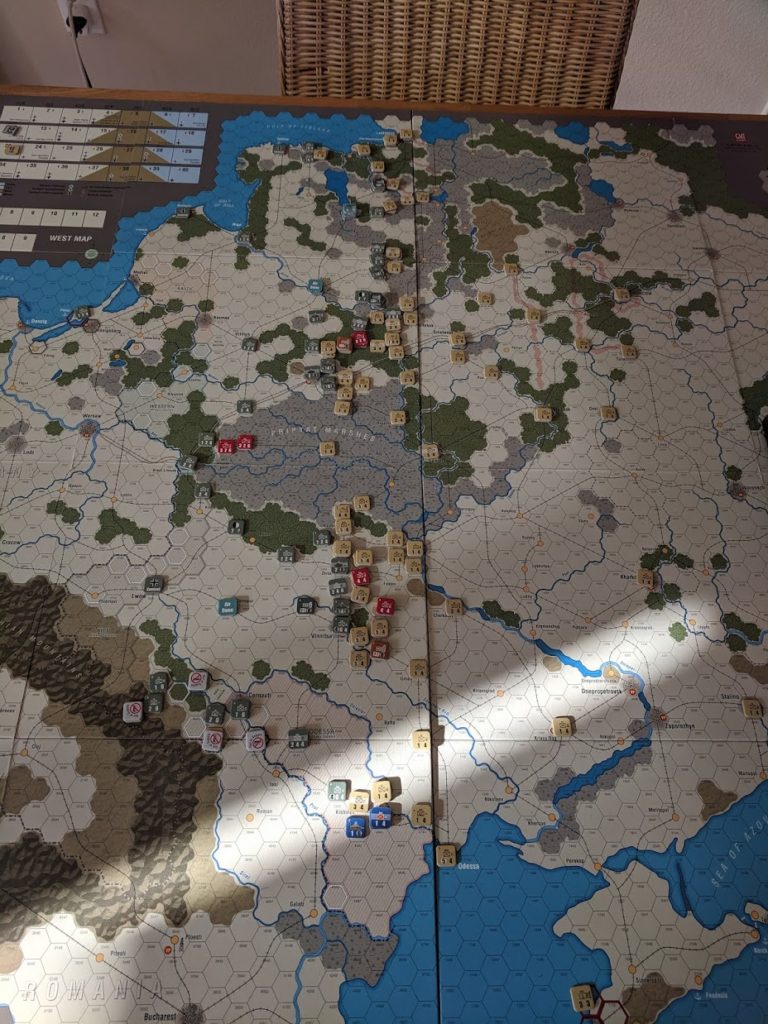
Turns 5 and 6 saw the first Rasputitsa. All offensives ground pretty much to a halt with only little gain. The Kossak raid on the rear Guard unit this turn saw the attacking unit destroyed but forced the axis player to withdraw units to guard the previously undefended flank of the Prypiet Marshes.
The biggest change right now is that the Soviets can rebuild 20 strength factors a turn, which I’ve been putting into 4 full-strength 5-4 infantry armies (which also have ZOC). By now, the Soviets are in a position of already place solid secondary lines of defenses, while the Axis is still at least one turn away from either Leningrad’s or Kiev’s defenses and not even close to Moscow’s outermost defense ring.
End of turn 6. Pretty much all Soviet forces are now stacks of two or three units deep.
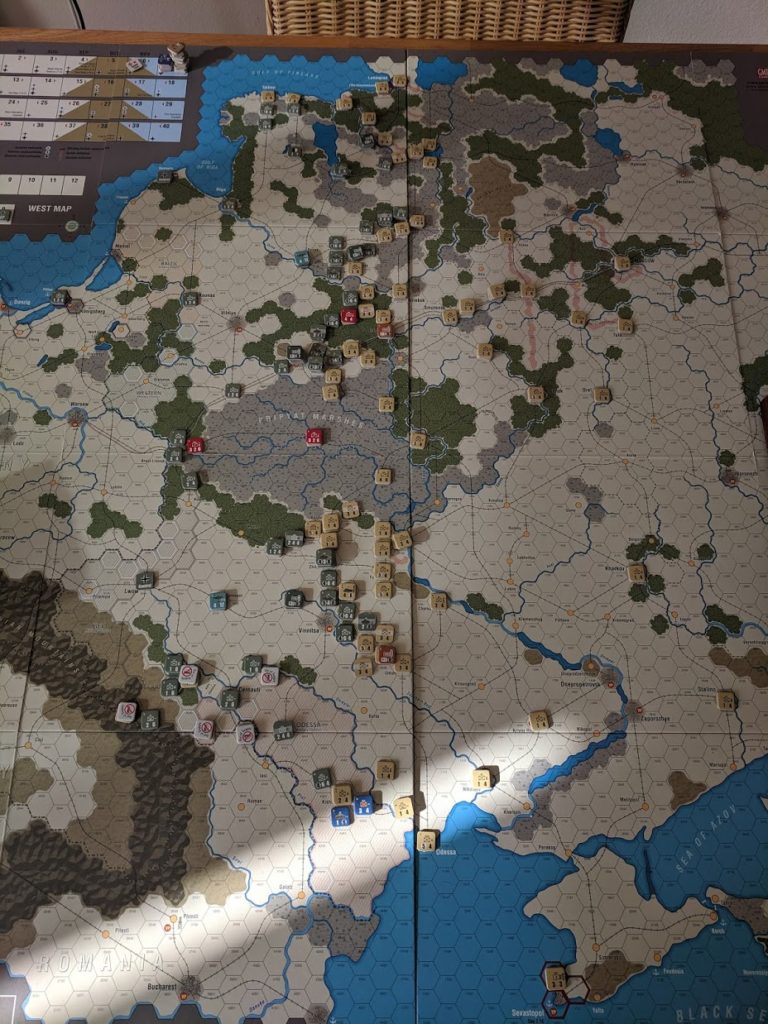
It’s pretty clear now that the A is will not reach this scenario’s finish line — the starting position for Case Blue, let alone Moscow. I’m already trying to figure out where and what went wrong but this scenario still has some turns to go. On to the winter turns in which Axis forces distant from city hexes fight as if OOS and fresh Soviet shock armies have arrived
Turn 3 and 4 (August and September ’41) of the Barbarossa play through. The game is still chugging along but progress is getting slower and harder to attain for the Germans. And we haven’t even encountered mud yet.
Rule questions and confusions
I keep tripping over rules such as Pz Army activation and tracing supply. Overall, the rules are still straight-forward but you have to read them carefully 😉 As I’m playing solitaire I fix smaller rule mistakes immediately but chalk up bigger ones as ‘friction’ or ‘fog of war’.
For example, both Soviet and German have different permissible Line-of-Supply lengths; that is the distance from the unit to a supply source. Supply sources are any railway hexes connected to the eastern map edge for the Soviets. Easy enough. However, for the Axis, it’s worded in a very round-about way. Supply sources can be either supply depots, cities, Pz Army HQs but then also railway hexes? I’m still a bit confused by what counts as valid supply line and what not. The way I’m playing now is that cities, depots and Pz HQs are supply sources with supply to them traced along railway lines.
The turns
Turn three was mostly used to straighten out the lines. Soviets got massive amounts of reinforcements and while the Axis side still had their attack bonuses this turn it, they ended up bloodying their nose against the determined Soviet defenses in key towns (Minsk and Vinnitsa). Unstoppable force vs immovable object.
End of Turn 3. Some progress was made in the north. However, both sides spent most of their turn straightening up their fronts, bringing up more troops and, in the Soviet case, bolstering secondary lines of defense.
The Axis lost their attack bonuses on turn four. finally saw some progress in the key towns of Minsk and Vinnetsa. Although full air support was used when available, many attacks have been made at lowish odds (1:1 and 2:1) due to the increased Soviet strength combined with defense bonuses. Both towns were taken with the help of lucky die rolls in the end.
A highlight of this turn was certainly the bold Kossak raid out of the Pripyet Marshes, displacing the supply depot and cutting the supply line to the 1st and 2nd Pz Armies. All Axis units are still in supply, as the logistics chit was drawn previously. However, that action will tie down some rear guard troops.
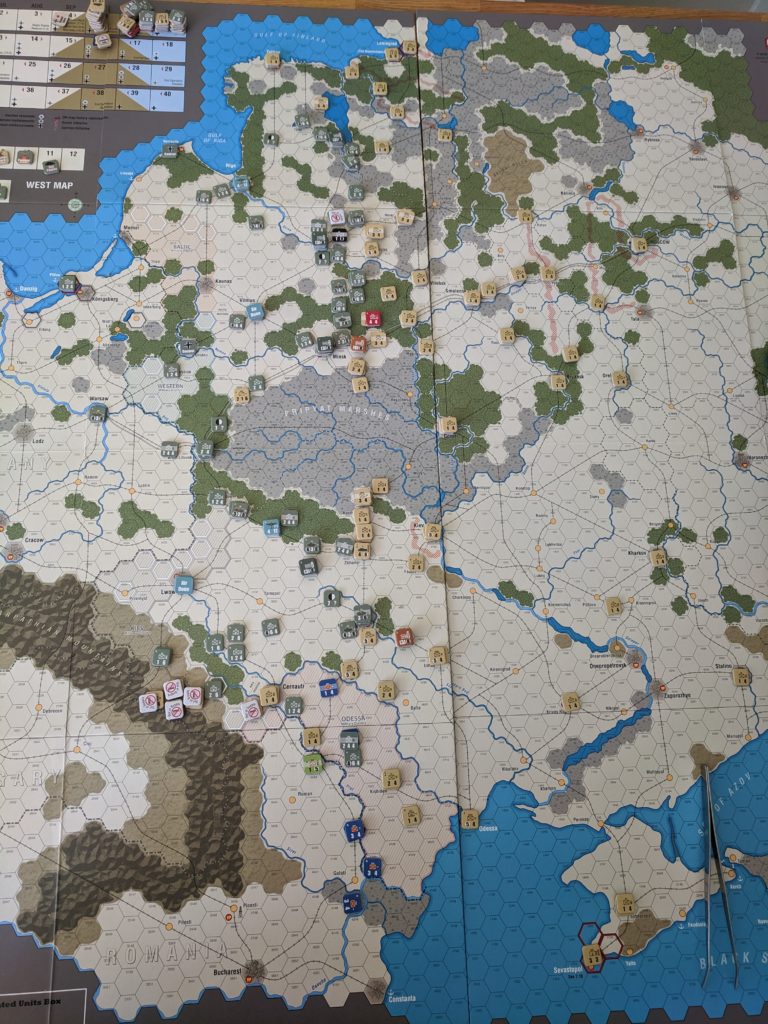
End of the fourth turn. AG North is making progress, AG Center is stuck and slogging ahead and AG South ran into walls of determined Soviet defenses.
Another result of the supply rules and lack of ZOCs are the (for the last 3 turns) OOS supply Soviet troops on the Hungarian border. Although OOS, they are not isolated, as a LOC of any length can still be drawn to the eastern map border. These troops have been slowly making their way to the east during counter attack movement rounds. Let’s see if a breakthrough is possible next round.
Looking at the map made me realize how far the Axis still has to go to hit the Scenario 2: Case Blue starting line. Coming up will be the first two mud turns followed by the Soviet counter attack during the winter turns.
The Dark Valley went past me the first time it got released. Initially it was the cover art that put me off (as well as the high purchase price) and the space requirements: two maps, three counter sheets — a proper mini monster. However, it somehow stuck on the back of my mind for quite some time and I kept checking out the game to see if I could get it on sale. Unfortunately, once I decided to pull the trigger it was sold out and I turned towards PC-based simulations: Gary Grigsby’s War in the East and Decisive Campaigns Barbarossa (both are now way old but still good).
Playing these games you notice that there’s just so much stuff — you are literally drowning in details. Playing a single turn takes hours; mostly due to the amount of things on screen but also due to the weird UI decisions — you would think that selecting and moving units on a map using a mouse is by now a solved problem…
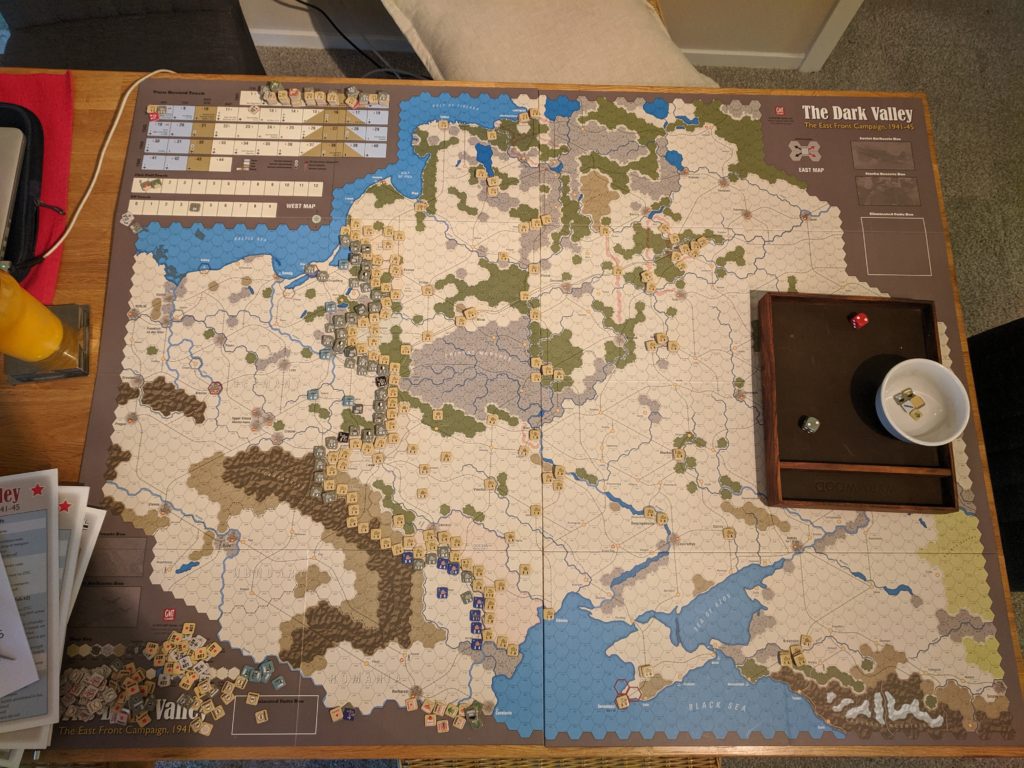
Anyway, while controlling all the stuff is in itself a statement on the campaign, I never made it very far into the campaign without burning out. Board games to the rescue! This game is still a mini-monster (setup took about an hour but I had to sort the counters too); however I was hoping that the game would be actually playable in one-to-two hour blocks and still make progress doing so. Chit-pull makes this very solitaire friendly and also gives the option to stop at any time between activations.
Components
Components are of standard (very-high) GMT quality. The graphical design will not win any prizes though. The counters are crisply printed and well cut but all the muted colors (especially of the map) look almost too conservative.
Three counter sheets of decent thickness are included, two mounted maps as well as a number of very well laid-out player aid charts. Rules clock in in a little less than forty pages and there’s a separate play book with scenarios and some questionable example of play (it literally shows every combat on turn 1 — I would have wished for more examples tackling specific questions, especially regarding logistics, etc) The rules are standard fare without much chrome, so you’re able to pick this one up immediately.
Grey – Ze Germans; Tan – Ze Soviets
There are two surprises in the OOB: most (initial) units are actually single-step and ZOCs are reserved to mechanized or two-step forces. That makes it easier for units to infiltrate around other forces.
Both lack of ZOC as well as chit-pull requires a lot of work to pull off large-scale encirclements as the supply is only checked when the logistics chit is drawn. Two encirclements failed in my current game as either supply was not checked in time, counter attacks broke through the encirclement or at least damaged units so badly that they lost their ZOC and a line of supply was restored.
As said above, rules are straight-forward and well written. Little chrome means also that most of the rules are groked and rule references are kept to a minimum.
From what I’ve seen so far, I like how supply is handled: supply is only checked when the logistics chit is pulled. Supply lines are tied to depicted roads and railroads. Additionally, supply heads are either depots that move along rail lines or the Pz Army HQs. Soviet supply just goes along any free railway that’s close by. DC:Barbarossa did something similar, in that it did away with all the logistics except for the Pz Armies, that is where supply matters.
The whole game feels like it is geared towards the campaign/Barbarossa scenario. All other scenarios are the full campaign with different starting conditions (similar to what EastFront II does). I was hoping for smaller training scenarios, maybe a Road to Leningrad or something like that. Similarly, my concerns about the large footprint remain. I can’t keep this one set up for too long. The mounted maps don’t help either; paper maps can at least be back-folded for smaller scenarios.
State of Play – Barbarossa Scenario
Barbarossa Scenario setup. Note the ton of Russian reinforcements on the turn track (and the lack of Axis reinforcements).
So, after punching and clipping all the counters (about 2 nights of movies) I set up the campaign. I didn’t put too much thought into optimizing starting positions — I just wanted to have a go at it and decide at the end of Barbarossa whether to continue.
End of first turn — chaos everywhere. The front has pretty much collapsed in the center and south, helped by disastrous mandated counter-offensives.
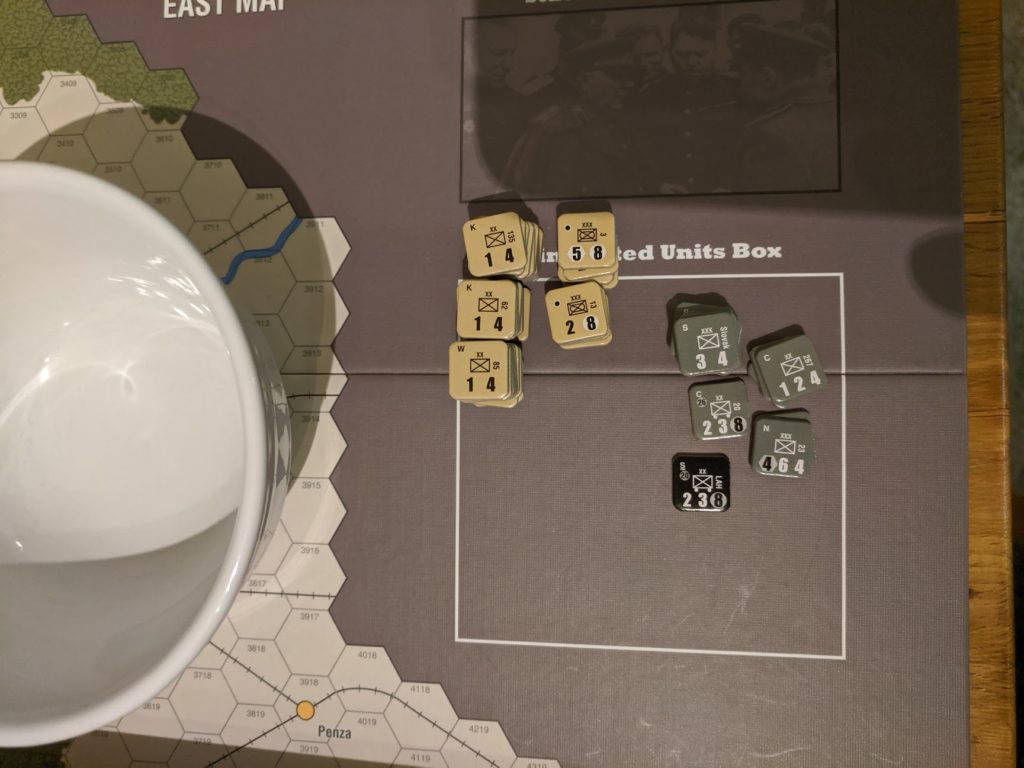
The initial turn saw tons of bad rolls on both sides which resulted in the destruction of almost too many German forces. Not pictured above are a successful breakout of a pocket due to good combat rolls. The Soviet counter attack chit was brutal — I rolled a 12 which meant that 12 attacks had to be taken. Some were successful but I also had to eliminate about 5 1-4 counters as there were no valid attacks possible.
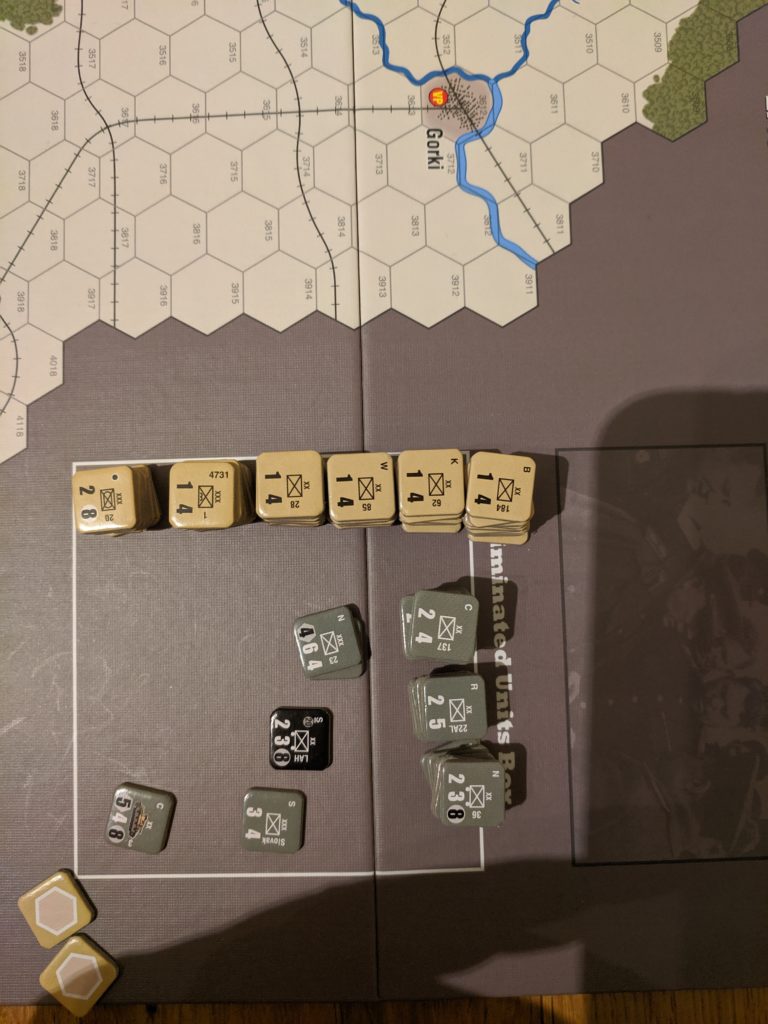
The turn 1 dead pool. Lots of initial speed bumps but (unfortunately for the Axis) also hard-to-replace full two-stack units.
Turn 2 saw the Soviets shoring up reserves and trying to build a new line of defense. A dash to Riga ended with a lucky die roll and taking the city. However more cities are holding out properly. Defense is working in this game with both a defense combat bonus as well as a CRT shift in addition to halving of mechanized combat strengths. Repeated assaults cost the German already his first tank division (and it’s not even muddy yet …)
Soviet cavalry managed to run and hide in the Pripyet Marshes from the West while other Soviet Infantry units try to infiltrate through the same marshes from the east.
A whole swath of Soviet units along the Hungarian border was put OOS when key railway junctions at Lwow and Tarnopol were taken. However, as there is still a LOC to the eastern map edge, none of these units count as isolated.
I’m still learning at this point but references to the rule book are very rare. The game moves along at a very decent pace. It helps that some chit pulls activate only some units and the brittleness (?) of units keeps the game moving — no need to long, attritional stand offs.
End of turn 2. Vilnius, Minsk and Tarnopol are still holding out. Note that Tarnopol in the South is still in-supply at the end of the turn, as supply was checked before the tank divsions(?) were moved into place to cut it off.Turn 2 Dead Pool. Each of the Soviet 1-4 piles are 10 units high. However, there are some serious, hard-to-replace losses on the German while the Soviet player will get tons of replacement over the next couple of turns.
It’s a another squad-level, tactical, WW 2 game with a focus on infantry combat. I’ve played an earlier edition (‘Band of Heroes’) quite some time ago but sold it. I recently had the itch for another WW2 tactical title but was not too keen into relearning ASL.
Components
Let’s start with the good and easy stuff. The components are nice, the counters are colorful, well-graphicked, thick and come prerounded on many, many sheets. The illustrations are good but in some cases show their age — some drawings are more detailed than others, some lack shading. The box is nice and big and has enough space left to keep all punched counters as well as additions to the base game, such as extra maps.
6 counter sheets in total. The Brits are in tan, the 82nd and 101st US are in olive drab, the Germans come in black, baby-blue and Feldgrau.
Speaking of, the maps are nice looking and with a good level of detail (but are working against the LOS rules — see below). Maps are available as standard or, for an additional fee, as double-sized x-maps. I like the small footprint of the game — two or three maps fit easily on the kitchen table which I think as an advantage that is quickly lost when using the x-maps. I use the latter only for single-map scenarios and certainly don’t think that they’re necessary or even a good purchase. Same goes for the scenario editor, but see below for my gripe with it.
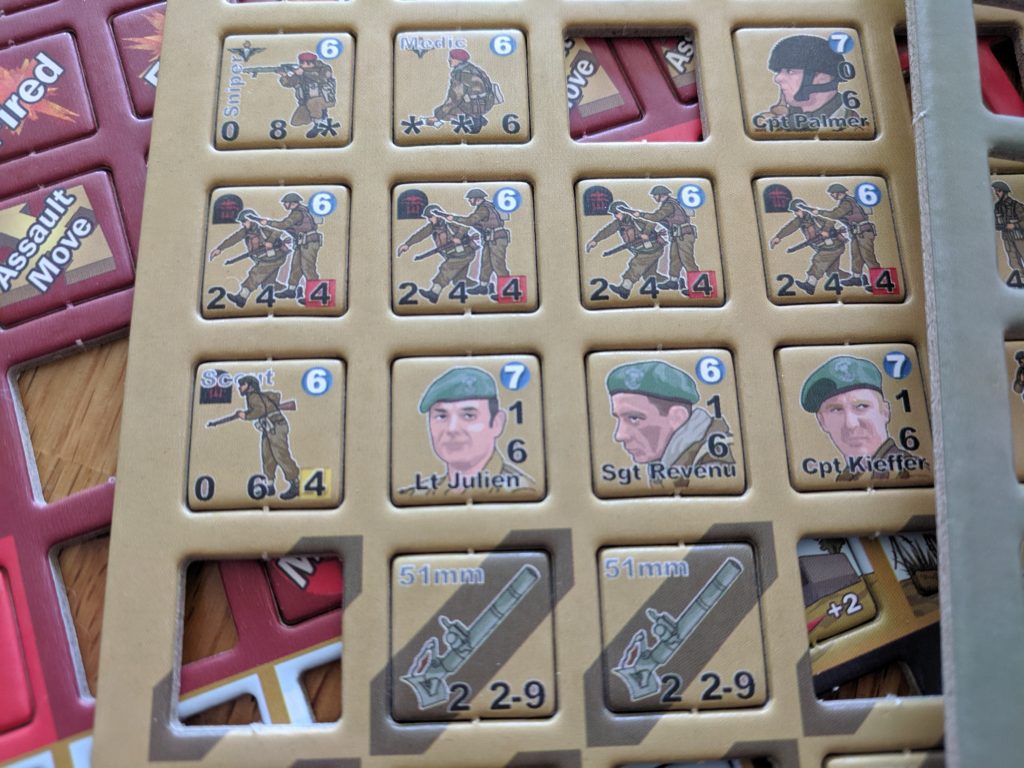
A close-up of the counters. All of them are nicely laid-out, illustrated and cut.
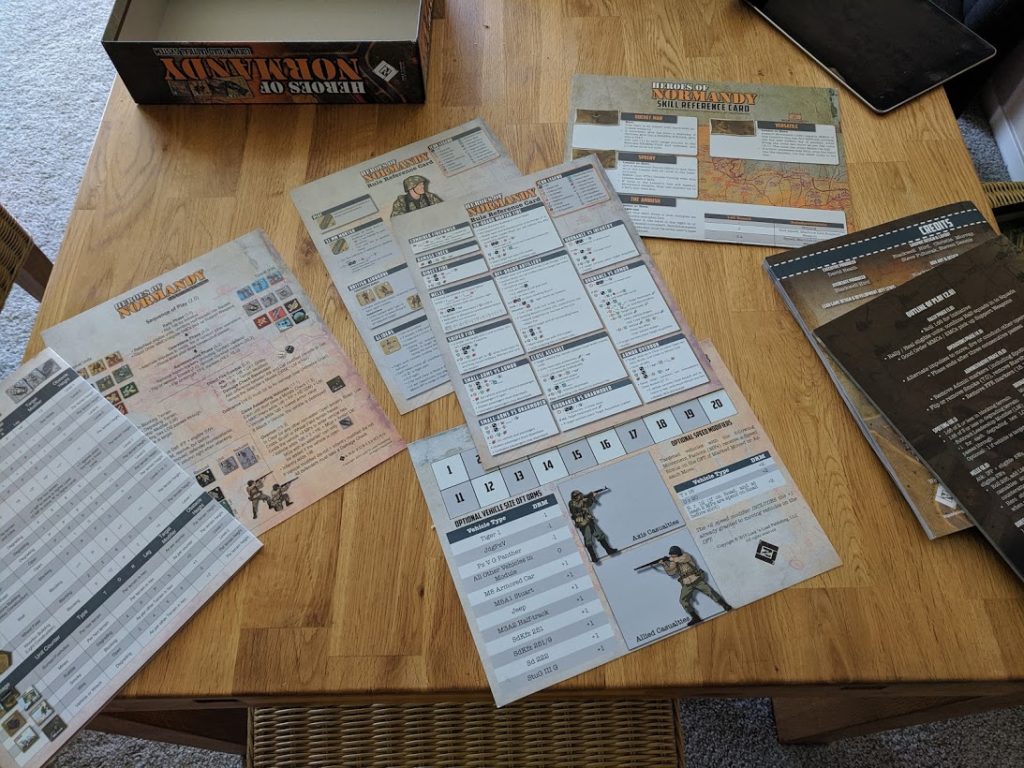
There are lots of player aid charts in the game and they are of very different quality and design. Looking at their layout and design, they feel like artifacts from different stages of the publishing process. The direct combat result procedure, for example, is present on three(!) of the charts, including the front and the back of the same chart but always in slightly different form and layout. I really would have hoped for a single layout style and to reduce the amount of repetition.
Tons of player charts. The one in the center, over the turn record chart is actually the most useful and packs the most information in the nicest layout. The one on the left below the terrain chart has a distinctly different layout. Was this printed at a different point during the production process?
Gameplay Overview
Players take turns activating hexes/stacks of units. The basic actions these units can take is either shoot or move — a very literal interpretation of the Fire & Movement concept.
Furthermore, before a unit can be targeted it must be spotted by other units. Units usually become spotted as soon as they start moving or firing. All units become unspotted at the beginning of a turn. These two rules create very dynamic and reactive scene: there are lulls in the fire combat which then starts again and builds up into a crescendo as units that are firing get fired on which in turn draws fire from other units. Overall, the effect is very neat and achieved with little rules.
The basic tactic of the game is find, fix, flank, finish. Fire combat is used to break units that then become easy prey for either further damage or close combat. So far, so standard.
Morale is handled in the same-old-unchanged-from-ASL manner: taking fire, units break and must pass a morale check before becoming good order again. There are only few leader-like figures that allow units to try to roll a morale check. Leaders therefore feel more like firemen, running from hotspot to hotspot, trying to rally the troops. Unfortunately, other forms of command and control are missing.
An interesting scenario; it starts on the lower map, where a US infantry force, supported by a single M4 tank must break through a determined Fallschirmjäger defense. At one point during the mission, the top map with the bridge comes into play and the US player must split his force. However, after that there is no interaction between the maps but the game plays on both maps at the same time. As an added twist, scenario length is also variable.
Heroes are created during morale checks and have randomly assigned capabilities, such as increase movement range or improved attacks when using bazookas.
Tanks and vehicles are present and are interesting. On one hand, tanks are very powerful, having multiple weapons that can fire independently are are pretty much impervious to small arms fire.
On the other hand, the claustrophobic nature of most maps mean that tanks can be ambushed easily. Infantry has a good chance to take out tanks in close combat, especially with support weapons, such as satchel charges. Some tanks are partially open (such as many tank destroyers) which means that they have no effective armor bonuses against infantry in close combat. Anti-tank guns seem also very effective in this game as tank damage is pretty much binary: either no damage at all, because the shot missed, or a deadly brew-up.
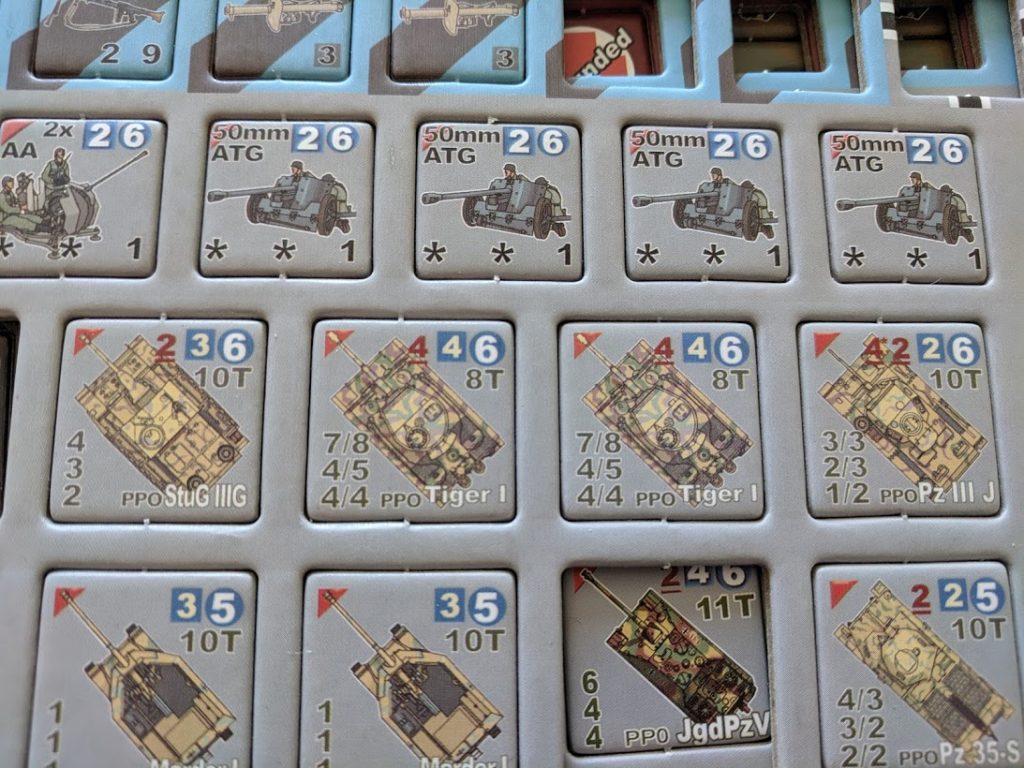
Like in ASL, tanks and guns are facing hex vertices, not hex sides. I’m not sure about the reasoning behind it, except that ASL does the same. Ordnance also relies on a to-hit procedure with a table look-up. Unfortunately, this table is printed on the backside of the counter, meaning that if you want to fire the tank’s gun, you will have to pick up the counter, squint at the tiny table, do your roll and put the counter back down to where it was. I don’t think that’s ideal, neither is that the tank counter itself is adorned with some 12 values.
Tank counters. That’s a lot of information right there and then there’s a table on the back of each counter as well.
Rule quibbles
The game comes with ruleset 4.2, which is well presented and easily digestable for the most part. These rules have been separated between ‘modern’ and ‘World War 2’ rule sets, which cut down on the to-ignor rules, such as Helicopters. There are still some very odd rules issues that should have been fixed by now. LOS is the prime example for this.
LOS is blocked by outlines of buildings, trees, etc. This sounds is used in other games (again ASL) but breaks down here as the ‘high quality’ graphics of the maps do not contain clear silhouettes. When is a LOS thread blocked by a tree if you can actually see individual branches? Would then LOS change if you use the X-maps, as they apparently show more detail?
Secondly, the rules become so murky around hex-edge terrain to be almost unusable. LOS is different, depending on whether it got traced through, out of, alongside or into a hex with a wall, hedges etc. Tellingly, the terrain effect chart, which should be used for quick reference, has multiple lines (plus footnotes) for each hexside terrain. It’s a mess.
Then, there are rules for LOS blocking when the hexes contain a blocking feature but are not blocking themselves … argh. I quickly ignored all that nonsense and applied common sense to LOS. I know LOS is hard but it’s also important at that scale and the rules feel underdeveloped here. This part needs some serious rules review.
There is also an abundance of different die roll procedures. Combat requires quite a bit of wristage: opposing rolls that then translate into a DRM for another table lookup … Firing big guns (ordnance) instead is lifted straight from ASL and requires two rolls. Morale check is a 2D6 vs target value, as is close combat but here the target value is determined by a force ratio … It’s all over the place and very inconsistent. I’m not asking for 2D6 roll for every action but this collection of different rolls just feels off.
However, the actual systems are fairly light on procedure and the DRMs are few and light and after some turns it just sticks and keeps chugging along with minimal reference to the rules. It never gets to the point of no rule references (such as with Academy Games’ Conflict of Heroes or GMT’s Combat Commander games) but it plays surprisingly well.
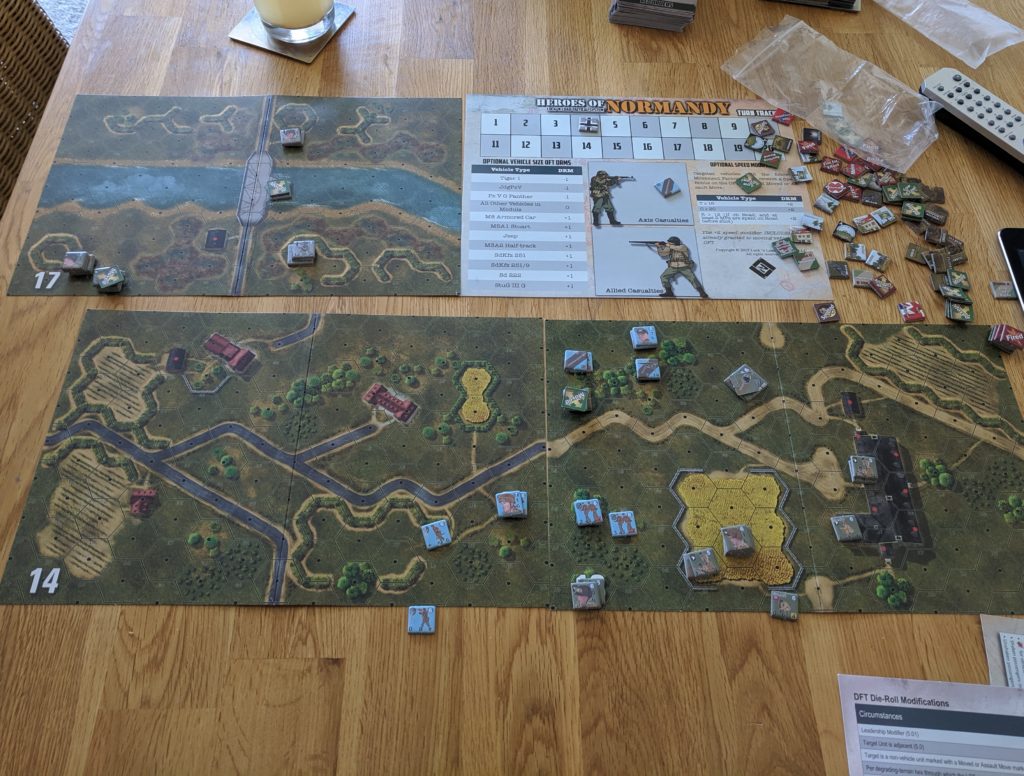
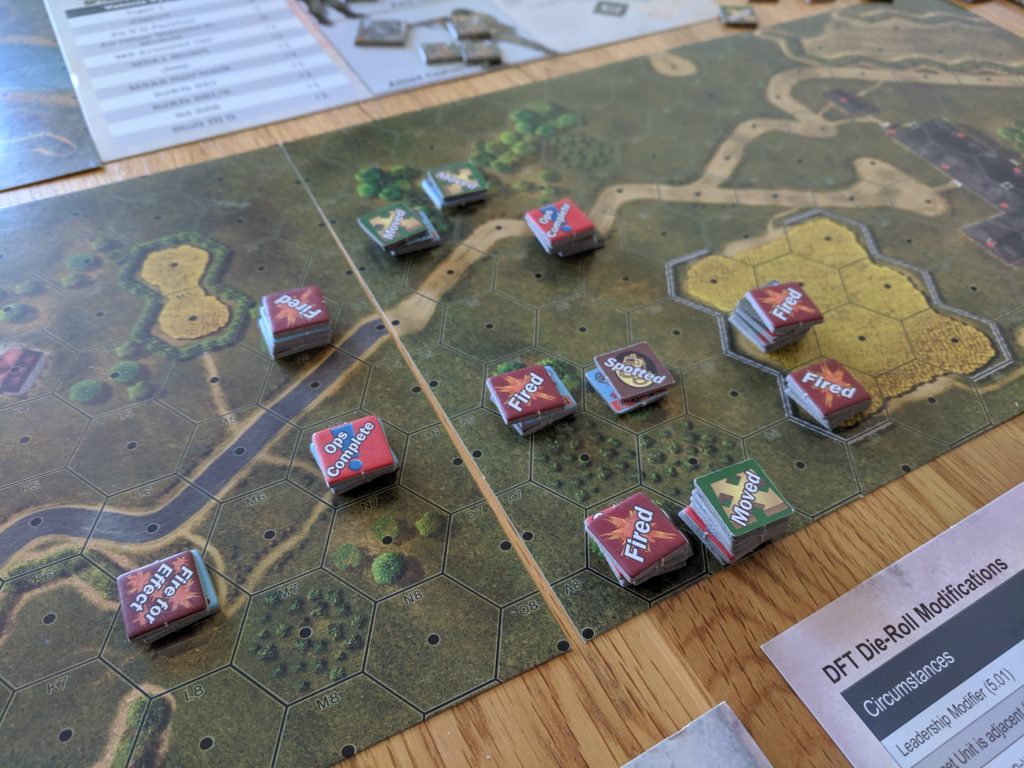
At the end of a turn. On one hand, it’s easy to see which unit has acted, due to the status markers, on the other hand, this game requires lots of status markers.
Scenarios
Most of the scenarios pit reinforced US or British paratroopers against combined-arms German forces. There are a few scenarios in which the Allied player gets some armor as well but these are rare.
Turn limits are short on most scenarios with only 6 or 7 turns until completion and to achieve success, the attacker must move and push hard. Oftentimes, the defender can take a more relaxed, reactive approach, as he controls most of the VPs from the start.
Scenarios are further randomized by either event marks with hidden instructions. These are usually used to tell a story and provide reinforcements. While they are a welcome addition for solo play, they might not hold up to either repeated play or more competitive FTF play. Furthermore, some scenarios require rolling on a randomized reinforcement table. A series of very one-sided rolls left little doubt about the scenario’s outcome.
For some reason, the more interesting (and balanced) scenarios featured the British Paratroopers. There are also some very interesting, oddball scenarios included that feature L-shaped map layouts, playing a parallel game on a separate map, and so on. There are usually two to three scenario special rules plus the event markers. The scenarios are leaning more towards the cinematic rather than the historical accurate.
A build-your-own scenario editor is not included but must be purchased for some $25. This is a very questionable. The official scenario editor does not add much that could not have been added to the Module manual. The base game is already expensive. Paying more for, in effect, a spreadsheet of unit values is just insulting (the inside of the cover shows even more duplicate player aid sheets, in case you were running out).
Solitaire friendliness
I played the game solitaire and it works really well that way. The alternating activations, spotting, random elements as well as the event markers really help. Activations are also very atomic and it’s easy to do one or two activations and then pause the game for a while. I would usually play a bit in the morning before leaving for work and a bit in the evening. Game play is also fairly short with scenarios usually taking two or three hours to resolve that way. This also prevents the frustrations (and boredom?) that build up when playing solitaire.
Final thoughts
I really liked playing the game. It’s very easy to set up scenario and play through it in one evening — there’s little time or space commitment. The scenarios are fun and the tactics you need to employ feel right. There’s a slight lean towards ‘Hollywood WW2’ but not as strong as in the similarly titled Heroes of Normandie or in the old and venerable Ambush!
The scenarios are interesting; however, a bit asymmetrical. This mostly due to the Normandy setting. I wonder if the east front game ‘Heroes of the Motherland’ is more interesting or balanced to play, as both sides should have combined arms in this setting. I’ve picked up the Vietnam game as well and will look into it soon 🙂
Production qualities (minus minor shortcomings) are great and a cut above usual wargaming fare.
Ran into more issues with wordpress. Dreampress’ one-click installation was just that: an installation without much support. Initially, I installed it into a subfolder of my existing website but soon ran into the problem that every second request to the homepage would end up as a 500 – Invalid Server Configuration error. Reinstalling it into a clean, dedicated hosted domain in Dreamhost’s panel seemed to solve it.
Hope this post will help some poor soul running into the same problem. Now I just have to figure out SSH setup again; at least I could reimport my old database.
In the spirit of Marie Kondo, I’m in the process of selling off some it my games. We moved twice in the last two years and while I still like my game collection I also realized that I’m actually playing only a small amount of games, mostly due to space and time constraints and there’s no need to lug around a large amount of cardboard.
Here is now a (hopefully growing) list of games I sold, as well as some thoughts on the games and why that had to go.
Stonewall Jackson’s Way II
I got the game mostly due to the fantastic map art. I played one or two scenarios up it never fully clicked. It’s a game of out maneuvering, securing bridge crossings, etc and I felt this didn’t work (for me) as a solo game 🙁
Where Eagles Dare
Again, another game with an absolutely fantastic map. I liked the chit pull mechanism too. However this game requires a lot of table space — too much for my taste. I wish I could write more about it, as it seems that Adam Starkweather’s CSS System is a direct descendant of it. I might try it once more if they have a one-mapper.
7th Fleet
A very cool game, but very 90s: full of stuff. The map and counters were solid. The were rules for subs, sub detection, air strikes, missile strikes, the list goes on … I liked it, did not play it enough (or at all) to appreciate all the different options it had to offer.
Decision at Elst
ASLSK as a one-mapper. The campaign game looked interesting but might not be the easiest introduction to ASLSK. I almost felt there were too many units on the board for a tactical game?
Fallen Eagles – Waterloo
The designers thesis in this game was that Waterloo was a battle of attrition. Boy, does this game represent this correctly. If I recall correctly, units took forever to whittle down and there were a lot units on the map. It also had some mechanical issues, such as counters being too large for hexes 🙁
On the other hand, it has a built-in order system, where you set ‘sector objectives’ for your divisions(?). Each division must then work to reach that objective. I have not yet found a good tactical replacement game for Waterloo (with the exception of W1815).
Let’s try this whole website thingy again and join the blog party, oh, about 15 years late. My hope is that by moving to wordpress I can actually do some jotting down of my thoughts and current projects as opposed to faff about in html (I do that already too much in my day job).
Not sure how/if I can import my previous site. For now, this little experiment will live in a separate spot.
What will be the content of this site? Not sure yet. Hopefully some smaller coding (I haven’t been active in my spare time though) and some wargaming projects.
Like every successful new-year’s resolution, this will hopefully also help me to actually do more of either.